
Adding a kitchen island isn’t just about extra counter space, it’s about rethinking how a kitchen works. Islands anchor the layout, provide storage where it’s needed most, and turn the kitchen into a gathering spot instead of a pass-through zone. Whether working with a spacious open floor plan or a modest galley layout, the right island can solve real problems: lack of prep area, awkward traffic flow, or wasted vertical storage. But size, placement, and features all matter. Get them wrong, and the island becomes an obstacle instead of an asset.
Table of Contents
ToggleKey Takeaways
- A well-designed kitchen island improves workflow efficiency by positioning within the work triangle of sink, stove, and refrigerator while providing essential prep space and storage.
- Maintain 42 to 48 inches of clearance on all sides of your island to ensure cabinet doors and appliances open without obstruction and prevent traffic flow issues.
- Kitchen islands are among the most requested home features and significantly boost resale value by signaling a modern, functional kitchen built for how people actually live.
- Popular 2026 trends include painted cabinetry in sage green and navy, two-tone island designs, and mixed materials like wood bases with stone or metal tops.
- Freestanding islands without plumbing or electrical work are solid DIY projects costing $400 to $800, but islands with sinks, cooktops, or major utilities require permits and licensed professionals to avoid code violations and costly mistakes.
Why Kitchen Islands Are the Ultimate Design Game-Changer
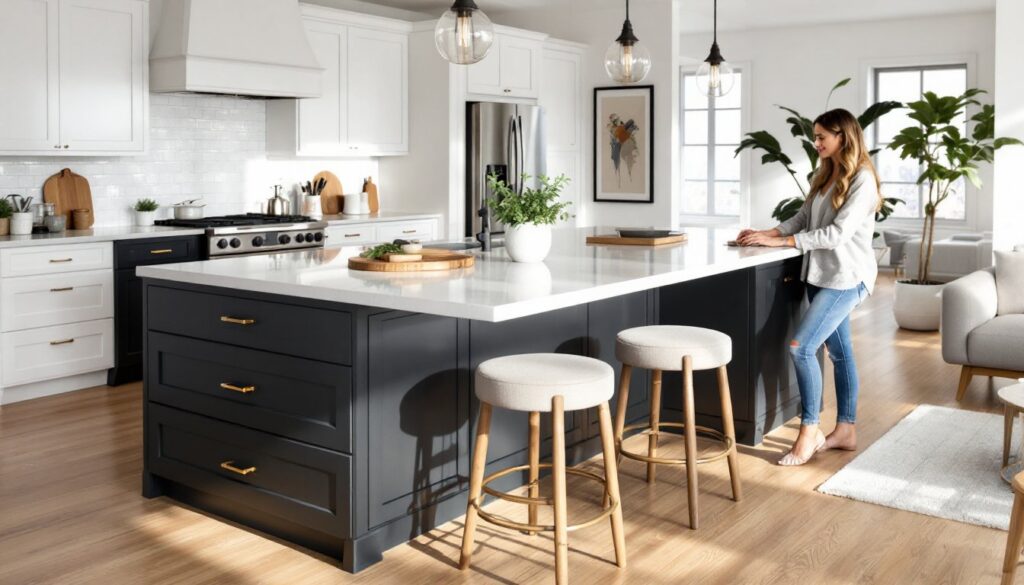
Kitchen islands deliver three critical benefits: workflow efficiency, additional storage, and flexible seating. In a well-designed kitchen, the island sits within the work triangle formed by the sink, stove, and refrigerator, reducing unnecessary steps during meal prep.
Islands also maximize vertical and horizontal storage. Base cabinets can house pots, small appliances, or pantry overflow. Adding drawers on both sides of the island doubles accessibility, especially in kitchens where multiple people cook together.
Seating transforms the island into a casual dining area or assignments station. A 12-inch overhang on one side accommodates standard counter-height stools, while a 15-inch overhang works for bar-height seating. This flexibility makes the island a hub for family interaction, not just cooking.
From a resale perspective, islands rank high on buyer wish lists. According to the National Association of Home Builders, kitchen islands are among the most requested features in new and remodeled homes. They signal a modern, functional kitchen, one that’s built for how people actually live.
Choosing the Right Island Size and Shape for Your Kitchen
Island size depends on available clearance, not just square footage. The standard rule: maintain 42 to 48 inches of clearance on all sides of the island to allow cabinet doors, drawers, and appliances to open without obstruction. In high-traffic kitchens with multiple cooks, aim for 48 inches.
For a small kitchen (under 150 square feet), consider a narrow island measuring 24 inches deep by 48 to 60 inches long. This footprint provides prep space and a bit of storage without choking the room. Freestanding butcher-block carts also work well here, they’re movable and don’t require permanent installation.
Mid-sized kitchens (150 to 250 square feet) can handle islands in the 36 to 42 inches deep range, with lengths from 60 to 84 inches. This size supports seating on one side and cabinetry on the other.
Large, open-plan kitchens allow for islands 48 inches deep or more, often with seating on two sides and built-in appliances like a cooktop or dishwasher. Popular kitchen design ideas emphasize proportion: the island shouldn’t dominate the room or force awkward navigation.
Shape matters, too. Rectangular islands suit most layouts. L-shaped islands work in corner kitchens or open floor plans where the island defines zones. Curved or rounded ends soften traffic flow and reduce sharp corners, helpful in homes with young kids.
Essential Features to Include in Your Island Design
The best islands are tailored to how the kitchen gets used. Start with the basics: countertop workspace, storage, and electrical outlets. Then layer in features based on priorities.
If the island will host a sink or cooktop, plan for plumbing and gas lines early. Adding a sink to an island requires drain and vent lines, often routed through the floor. This is structural work, expect to pull permits and potentially hire a licensed plumber. Cooktops need adequate ventilation, either a downdraft vent built into the island or an overhead hood. Both options add cost and complexity.
Electrical outlets are non-negotiable. The National Electrical Code (NEC) requires at least one receptacle on an island countertop, installed to prevent cords from draping over edges. Pop-up outlets keep the surface clean when not in use.
Microwave drawers, wine fridges, and warming drawers are popular add-ons, but they eat into cabinet storage. Prioritize based on cooking habits. A wine fridge makes sense for frequent entertainers: a warming drawer is overkill for most households.
Storage Solutions and Seating Options
Storage: Base cabinets with pull-out shelves maximize access to deep spaces. Drawer stacks work well for utensils, cutting boards, and linens. Open shelving on the island’s backside (facing the dining or living area) can display cookbooks or dishware, but it requires regular tidying.
For corner or L-shaped islands, lazy Susans or swing-out trays prevent dead zones. Toe-kick drawers, shallow drawers installed in the 4-inch space below base cabinets, capture otherwise wasted storage for baking sheets or placemats.
Seating: Counter-height islands (36 inches) use 24-inch stools and need a 12-inch overhang. Bar-height islands (42 inches) require 30-inch stools and a 15-inch overhang. If the island includes a raised bar, ensure it doesn’t block sightlines into adjacent rooms.
Leave 24 inches of counter width per seat for comfortable spacing. A 60-inch island fits two seats: 84 inches fits three. If the island doubles as a workspace, avoid seating on all sides, it limits functional counter area.
Popular Island Layout Styles for Every Kitchen Type
Island layout depends on the kitchen’s footprint and how the space flows into adjoining rooms.
Single-level island: The most common style. The entire surface sits at one height (typically 36 inches), providing uniform workspace and simple construction. It’s the easiest to DIY and the most budget-friendly.
Two-tier island: Features a raised bar section (usually 42 inches) on one side for seating, with the main surface at standard counter height. This style hides kitchen clutter from the dining or living area and creates visual separation. It requires additional framing and countertop material, adding cost.
Galley or parallel island: Long, narrow islands that run parallel to the main counter run. Works in galley kitchens where space is tight. Keeps the work triangle compact and efficient.
L-shaped island: Extends from the main counter, forming an L. Common in open floor plans where the island defines the kitchen boundary. One leg often includes seating: the other holds appliances or a sink.
Floating island: Freestanding, not attached to walls or cabinets. Can be moved if needed (though plumbed or wired islands aren’t truly portable). For homeowners who enjoy variety in modern home decor, freestanding butcher-block or metal islands offer flexibility without permanent commitment.
Peninsula: Technically not an island, it’s attached to a wall or cabinet run on one end. Functions like an island but works in tighter layouts where a true island would obstruct flow. No plumbing or electrical code complications if it’s an extension of the existing counter.
Materials, Finishes, and Color Trends for 2026
Countertop choices define the island’s look and durability. Quartz remains popular for its low maintenance and wide color range, expect to pay $60 to $120 per square foot installed. Butcher block (typically maple or walnut) adds warmth and works well for prep surfaces, but it requires regular oiling and isn’t heat-resistant.
Granite and marble deliver high-end appeal. Marble scratches and stains easily, so it’s better suited to low-traffic areas or decorative use. Granite is more forgiving. Both need periodic sealing.
For budget-conscious projects, laminate countertops have improved significantly. Modern laminate mimics stone or wood grain and costs $20 to $50 per square foot. It’s DIY-friendly, most homeowners can install it with a circular saw and contact adhesive.
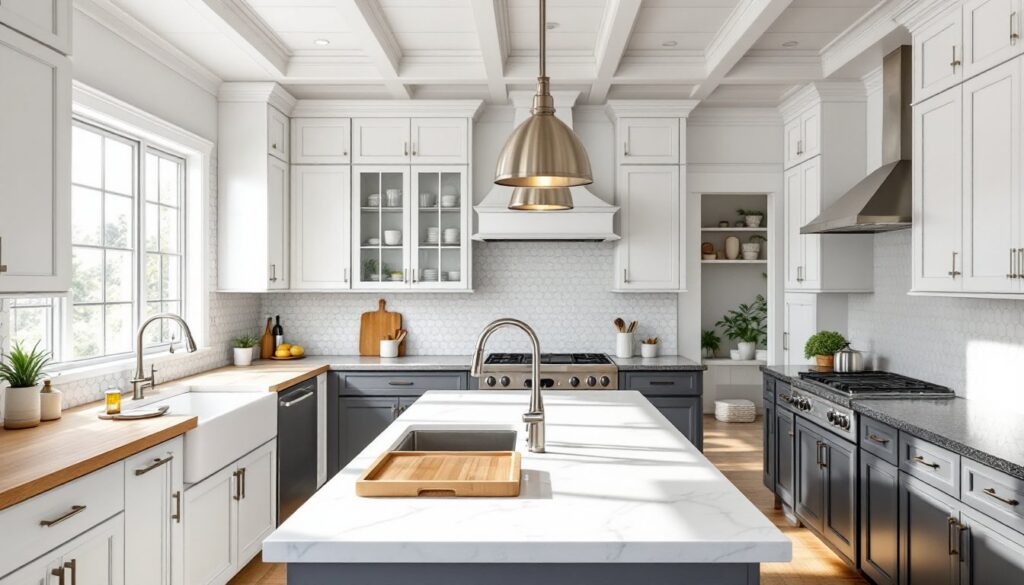
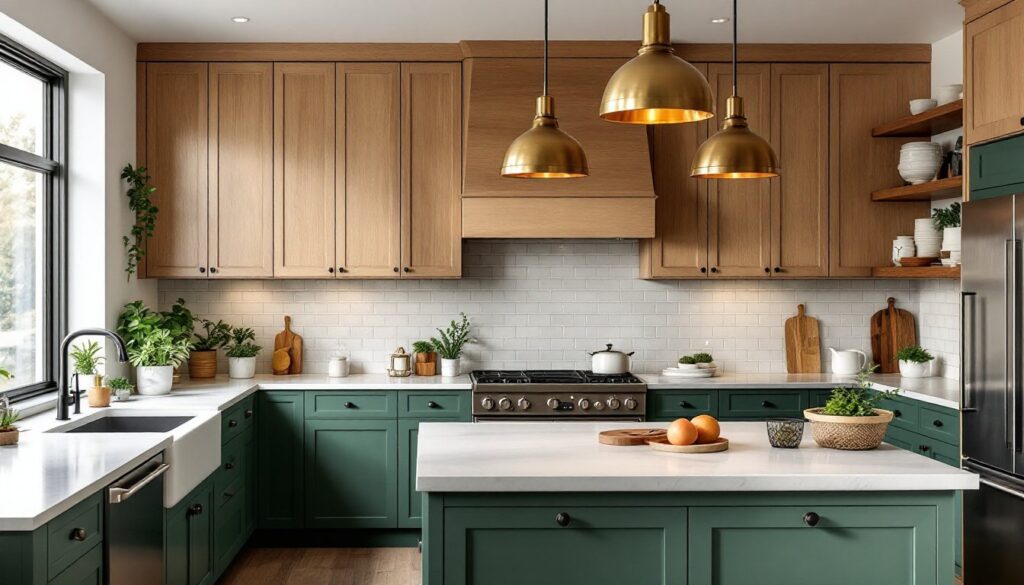
Cabinet finishes: Painted cabinetry in sage green, navy, or charcoal is trending in 2026, often paired with natural wood tones or white perimeter cabinets. Two-tone kitchens, where the island contrasts with surrounding cabinets, add visual interest without overwhelming the space.
Many freestanding kitchen islands incorporate mixed materials: wood base with a stone or metal top. This approach layers texture and breaks up monochromatic schemes.
Hardware: Matte black, brushed brass, and unlacquered brass pulls are replacing polished chrome and nickel. Unlacquered brass develops a patina over time, some homeowners love the character: others prefer the consistency of sealed finishes.
Flooring transition: If the island sits at the boundary between kitchen tile and living-room hardwood, use a transition strip or run the same flooring throughout for a seamless look. Avoid abrupt material changes directly under the island, it disrupts visual flow.
DIY vs. Professional Installation: What Homeowners Need to Know
Freestanding islands without plumbing or electrical work are solid DIY projects. A basic island can be built using stock base cabinets, a countertop, and trim. Many homeowners assemble two 24-inch-deep base cabinets back-to-back, secure them with wood screws, and top with butcher block or laminate.
Tools needed: drill/driver, level, stud finder (if anchoring to the floor), circular saw or miter saw for trim, and clamps. Total material cost for a 60-inch island with stock cabinets and laminate top: $400 to $800, depending on cabinet quality.
Moving or adding plumbing and electrical lines requires permits in most jurisdictions and often mandates licensed tradespeople. Running a new drain line through a concrete slab, for example, involves cutting the slab, trenching, and pouring new concrete, not a DIY task unless the homeowner has concrete and plumbing experience.
Installing a cooktop or range in an island means routing a gas line (if applicable) and ensuring proper ventilation. Gas work must be done by a licensed plumber or gas fitter. Downdraft vents require ductwork routed through the floor or wall, which may involve structural modifications.
Permitting: Adding or relocating plumbing, gas, or 240V electrical (for an induction cooktop, for instance) typically requires permits. Inspectors verify code compliance, especially for venting and shutoff valves. Skipping permits can complicate home sales or insurance claims.
When to hire a pro: If the project involves structural changes (removing a wall to make room for an island, reinforcing floor joists for a heavy stone countertop), consult a structural engineer or contractor. If the island includes a sink, dishwasher, or cooktop, budget for a plumber and electrician. Countertop fabrication and installation, especially for granite, quartz, or marble, is best left to professionals who have the tools to cut and polish edges cleanly.
DIYers can handle cabinet assembly, painting, hardware installation, and butcher-block sealing. For everything else, weigh the cost of mistakes (water damage from improper plumbing, code violations, cosmetic flaws) against the cost of hiring help. Most kitchen island projects fall somewhere in the middle: DIY the cabinetry, hire out the trades.