
A poorly designed kitchen layout turns meal prep into an obstacle course. Homeowners often realize too late that their dream appliances mean nothing when they’re bumping into cabinet doors or walking laps around an island just to grab a cutting board. Good kitchen design starts with spatial planning, not finishes. Before anyone picks backsplash tile or countertop slabs, they need to nail down where the sink, stove, and refrigerator will sit, and how the space between them will actually function under real-world use.
Table of Contents
ToggleKey Takeaways
- The work triangle—connecting sink, stove, and refrigerator within 4-9 feet per leg—provides a proven starting point for kitchen efficiency, though modern designers increasingly prioritize flexible work zones over geometric precision.
- A kitchen layout must balance appliance placement, traffic flow, and storage accessibility; measuring accurately and sketching layouts to scale prevents costly mistakes before cabinets are ordered.
- How to design kitchen layout successfully depends on room dimensions and configuration: galley kitchens suit tight spaces, L-shaped layouts offer versatility, U-shaped kitchens maximize storage, and islands add functionality only with adequate clearance (42-48 inches).
- Counter space should flank major work zones—15 inches by the refrigerator, 12-18 inches beside the cooktop, and 18-24 inches near the sink—with a dedicated 36-inch prep area whenever possible.
- Appliance placement drives functionality: position the sink under windows for light, locate the refrigerator near the entrance, ensure proper venting for cooktops, and confirm electrical circuits can support the load before finalizing placement.
Understanding the Classic Kitchen Work Triangle
The work triangle is the concept that connects a kitchen’s three primary work zones: the sink, the stove (or cooktop), and the refrigerator. The idea emerged in the 1940s when kitchen efficiency studies suggested that keeping these three points relatively close minimizes wasted steps during cooking.
The classic guideline calls for each leg of the triangle to measure between 4 and 9 feet, with the total perimeter falling between 13 and 26 feet. If distances are shorter, the cook feels cramped. If they’re longer, the kitchen becomes inefficient.
But the work triangle isn’t gospel. It works well in smaller, single-cook kitchens. In larger spaces with multiple cooks or islands that function as prep stations, the triangle becomes less relevant. Modern designers often refer to work zones instead, dedicated areas for prep, cooking, cleaning, and storage that don’t necessarily form a tidy geometric shape.
Still, the triangle offers a useful starting point. When sketching out a new layout, homeowners should ensure that major appliances aren’t clustered into one corner or scattered so far apart that making a sandwich feels like a hike.
Choosing the Right Kitchen Layout for Your Space
Kitchen layouts are dictated by room dimensions, door and window placement, and whether structural walls limit flexibility. Certain configurations suit specific footprints better than others.
Galley and L-Shaped Layouts
A galley kitchen features two parallel runs of cabinets and countertops, with a walkway down the center. It’s efficient for tight spaces, common in apartments, condos, and older homes. The work triangle naturally aligns along the galley, minimizing travel. The downside? Traffic flow. If the galley serves as a hallway to another room, it becomes a choke point.
Aim for a minimum 42-inch clearance between facing cabinets to allow drawer and appliance doors to open without interference. If two cooks will share the space, 48 inches is better.
An L-shaped layout wraps cabinetry along two perpendicular walls, leaving the remaining space open. It’s one of the most versatile configurations. The open end can accommodate a table, island, or simply leave room for foot traffic. L-shapes work well in square or slightly rectangular kitchens and allow for a clean work triangle without crowding.
One common mistake: placing the sink or cooktop in the corner of the L. Corner base cabinets are notoriously hard to access. Reserve corners for lazy Susans or pull-out organizers, not active work zones.
U-Shaped and Island Layouts
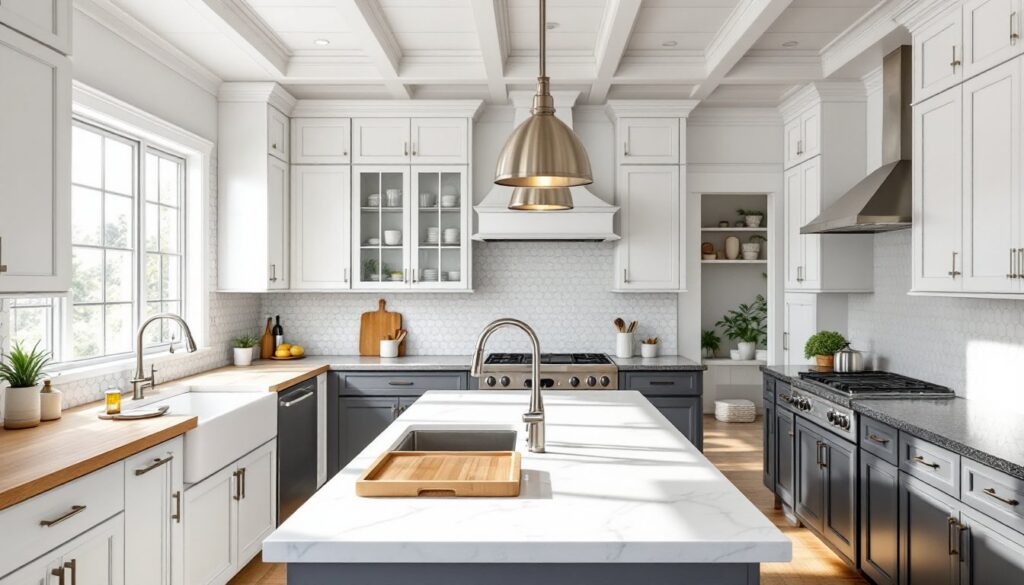
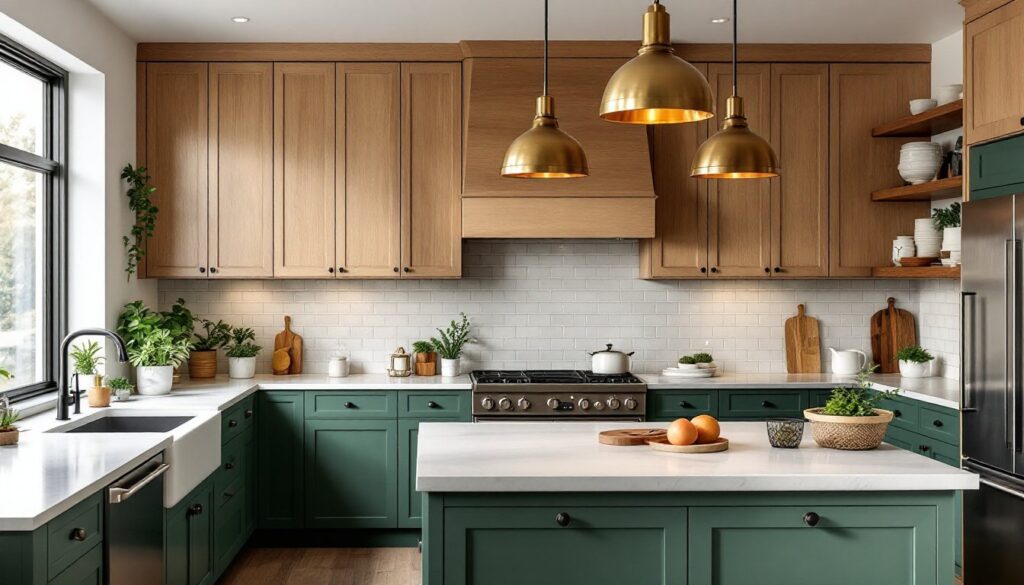
A U-shaped kitchen uses three walls, wrapping cabinetry around the cook. It maximizes counter and storage space, ideal for serious home cooks who need multiple prep surfaces. The layout naturally divides work zones, sink on one wall, cooktop on another, refrigerator on the third.
U-shapes require adequate room dimensions. If the kitchen is too narrow, the cook will feel boxed in. Maintain at least 6 to 8 feet between opposing cabinet runs. Anything less and the space feels cramped, especially with appliance doors open.
An island layout can accompany L- or U-shaped kitchens, or stand alone in open-plan designs. Islands add counter space, storage, and seating. They also create a natural gathering spot. But islands demand square footage. As a rule of thumb, there should be at least 42 to 48 inches of clearance on all sides for comfortable movement.
Islands can house a sink, cooktop, or both, though this adds plumbing and electrical complexity. Gas lines for cooktops may require permits and a licensed plumber. Electrical outlets on islands must meet NEC (National Electrical Code) requirements, typically requiring GFCI-protected receptacles within certain distances of the countertop edge.
When space is tight, a rolling cart or peninsula (an island attached to cabinetry on one end) offers similar benefits without the footprint.
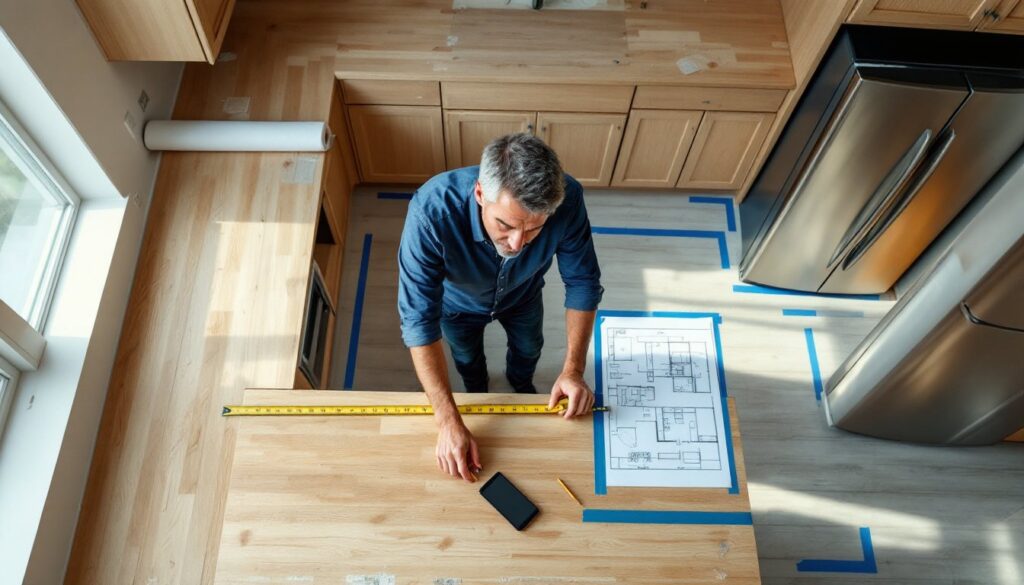
Measuring Your Kitchen and Planning for Traffic Flow
Before sketching layouts or shopping cabinets, homeowners need accurate measurements. Use a 25-foot tape measure and record dimensions in inches, not feet and inches, to avoid conversion errors.
Measure wall lengths at counter height (about 36 inches up), not at the floor or ceiling. Walls aren’t always perfectly straight. Note the locations of windows, doors, electrical outlets, light switches, HVAC vents, and any permanent fixtures like radiators or support columns.
Don’t forget vertical dimensions. Measure from floor to ceiling, and check for bulkheads, soffits, or ductwork that might limit upper cabinet height. Standard base cabinets are 34.5 inches tall (36 inches with countertop), and upper cabinets typically start 18 inches above the counter.
Traffic flow is often an afterthought, but it makes or breaks a layout. Kitchens need clear pathways, especially if they connect to dining areas, mudrooms, or back doors. The primary work aisle (the stretch where the cook moves most often) should be at least 42 inches wide. Secondary aisles can shrink to 36 inches.
If the kitchen doubles as a hallway, consider a layout that keeps through-traffic out of the cook’s path. Popular kitchen organization tips often emphasize zoning to separate circulation from active prep zones.
Draw the layout to scale, ¼-inch graph paper works, or use free online planning tools. Cut out scale templates of appliances and cabinets (or use digital versions) and move them around until the flow feels right. Mock it up with painter’s tape on the actual floor to visualize dimensions and catch spacing issues before committing.
Designing Storage Solutions and Counter Space
Counter space and storage rank high on every homeowner’s wish list, but both require deliberate planning. The goal isn’t just maximizing square footage, it’s putting usable surfaces and accessible storage where they’re needed most.
Counter space should flank each major work zone. Place at least 15 inches of counter on the latch side of the refrigerator for setting down groceries. On either side of the cooktop, allow 12 to 18 inches for pot handles and prep. Next to the sink, aim for 18 to 24 inches on one side (preferably the side nearest the dishwasher) for dish drying and food prep.
For primary prep areas, contemporary kitchen design trends suggest dedicating a 36-inch uninterrupted run if possible. This is where cutting boards, mixing bowls, and ingredient staging happen.
Storage is about accessibility, not just volume. Deep base cabinets waste space if items get buried in back. Pull-out shelves, drawer-style base cabinets, and vertical dividers for baking sheets keep contents visible and reachable.
Upper cabinets should extend to the ceiling when possible. The top shelves hold seldom-used items (holiday platters, extra vases), while everyday dishes and glasses stay at eye level. Soft-close hinges and full-extension drawer slides cost more upfront but reduce wear and make the kitchen feel more refined.
Pantry placement matters. A walk-in pantry is ideal, but most kitchens rely on tall cabinet pantries. Position it near the refrigerator and prep area, not across the room. Corner cabinets benefit from lazy Susans or LeMans-style pull-outs, which make awkward spaces functional.
Don’t skimp on drawer organizers and divider inserts. A well-organized 18-inch drawer holds more usable items than a cluttered 30-inch cabinet.
Selecting Appliance Placement for Maximum Efficiency
Appliances are the anchors of any kitchen layout. Their placement drives the work triangle, defines task zones, and determines whether a kitchen feels intuitive or frustrating.
Start with the sink. It’s the most-used fixture and typically placed under a window for natural light and ventilation. Sinks require plumbing, drain and supply lines, so moving one can mean rerouting pipes through walls or under floors. If the sink stays put, the rest of the layout works around it.
The refrigerator should sit near the kitchen entrance, so someone grabbing a snack doesn’t cross the cook’s path. It also needs clearance for door swing, add a few inches if the door opens toward cabinetry. Counter-depth models (around 24 inches deep) align with standard cabinetry for a built-in look, while standard-depth units (about 30 inches) protrude but offer more interior volume.
Range or cooktop placement depends on venting. If installing a range hood, it must vent outside (preferred) or recirculate through filters. Ducted hoods need clear roof or wall access. Cooktops on islands require downdraft vents or overhead hoods, both add cost and complexity. Leave at least 9 inches of clearance between the cooktop and any combustible surface (like a window frame or upper cabinet).
The dishwasher goes next to the sink, ideally on the side closer to dish storage. Plumbing and electrical hookups are simpler when the dishwasher and sink share a wall. Make sure the dishwasher door has room to open fully without hitting the island or opposite cabinetry.
If the layout includes a wall oven and separate cooktop, position the oven at a comfortable height, mid-wall ovens reduce bending. Ensure there’s counter space next to the oven for hot pans.
Small appliances clutter counters fast. Designate a appliance garage (a cabinet with a roll-up door) or a dedicated lower cabinet with an outlet inside for toasters, blenders, and coffee makers. Effective kitchen layout strategies often hide small appliances to keep surfaces clear.
Before finalizing appliance placement, confirm that electrical circuits can handle the load. Refrigerators, dishwashers, microwaves, and disposals typically need dedicated 20-amp circuits. Ranges require 240-volt service. If the existing panel can’t support new appliances, an electrician may need to upgrade it, factor that into the budget.
Finally, double-check clearances. Building codes (like the IRC) and appliance manufacturer specs dictate minimum distances from walls, other appliances, and combustibles. Ignoring these can void warranties or create fire hazards.
A well-designed kitchen layout doesn’t happen by accident. It starts with honest measurement, respect for work zones, and deliberate appliance placement. Homeowners who invest time in planning, before the first cabinet order, end up with kitchens that work as hard as they look good.