
The backsplash is the unsung hero of kitchen design, a five-foot stretch of wall that works harder than almost any other surface in the house. It’s the shield between your drywall and flying bacon grease, the backdrop for cooking videos, and the detail guests notice when they lean against the counter with their morning coffee. Getting it right means balancing durability, cleanability, and style in a space where all three matter. Whether working with a tight budget or planning a full gut renovation, the backsplash decision sets the tone for the entire kitchen.
Table of Contents
ToggleKey Takeaways
- Kitchen design backsplash serves three critical functions: protecting walls from moisture and staining, providing an easy-to-clean high-traffic surface, and anchoring your kitchen’s visual design.
- Ceramic and porcelain tile remain the most affordable and versatile backsplash materials, with ceramic starting at $1–3 per square foot and offering thousands of design options.
- A kitchen design backsplash is an ideal place to take design risks since it covers a smaller area than countertops or flooring, making bold colors and premium materials more budget-friendly.
- Proper surface preparation and layout planning are essential for DIY installation—use a wet saw for cuts, establish a level starting line, and work in small sections to prevent thinset from drying too quickly.
- Complex patterns like herringbone and chevron require 30–40% more material due to edge cuts and can cost professionals 30–50% more in labor compared to simple subway tile designs.
- Unsealed grout is the weak link in ceramic and porcelain installations; plan to seal grout annually in high-use areas or invest in epoxy grout that never requires sealing.
Why Your Backsplash Is More Than Just a Pretty Face
A backsplash does three jobs simultaneously: it protects walls from moisture and staining, provides an easy-to-clean surface in a high-traffic zone, and anchors the visual design of the kitchen. Without proper backsplash coverage, drywall behind the stove absorbs grease and steam, leading to mold growth and paint failure within a year or two.
From a code perspective, most jurisdictions don’t mandate backsplashes in residential kitchens, but they’re standard practice for good reason. The area behind the range and sink sees the most abuse: splattering oil, boiling water, and daily scrubbing. Water-resistant materials are essential here, especially if the backsplash runs along exterior walls where condensation can be an issue.
Beyond function, the backsplash is one of the few places in a kitchen where homeowners can take risks without breaking the budget. It’s a smaller surface area than countertops or flooring, so bolder tile choices or pricier materials become feasible. A subway tile backsplash might cost $8–15 per square foot installed, while the same kitchen with quartz countertops runs $60–120 per square foot. That cost difference lets DIYers experiment with color, texture, and pattern in ways that feel too committal on larger surfaces.
Popular Backsplash Materials and Their Pros and Cons
Material choice drives everything else, cost, installation complexity, maintenance, and longevity. Here’s what works, what doesn’t, and where each material makes sense.
Ceramic and Porcelain Tile
Ceramic tile remains the go-to for most kitchen backsplashes, and for good reason. It’s affordable (starting around $1–3 per square foot for basic field tiles), available in thousands of colors and finishes, and holds up to heat and moisture without issue. Standard sizes include 3×6-inch subway tiles, 4×4-inch squares, and 12×24-inch planks. Glazed ceramic resists staining better than unglazed, which matters when tomato sauce becomes a regular visitor.
Porcelain tile is denser and less porous than ceramic, making it the better choice for areas that see heavy water exposure, think behind a farmhouse sink or a pot-filler faucet over the range. It’s harder to cut (a wet saw with a diamond blade is non-negotiable), but it won’t crack from thermal shock when a hot skillet gets set down nearby. Porcelain runs $3–8 per square foot for quality options, with designer styles pushing $15 or more.
Both ceramic and porcelain require grout, which is the weak link. Unsealed grout absorbs stains and moisture. Plan to seal grout lines with a penetrating sealer after installation and re-seal annually in high-use areas. Epoxy grout costs more upfront but never needs sealing, worth considering behind the cooktop.
Glass and Natural Stone
Glass tile delivers color intensity that ceramic can’t match, especially when backlit by under-cabinet LEDs. It’s non-porous, so staining isn’t a concern, and it’s easy to clean with standard glass cleaner. The downsides: it’s fragile during installation (expect 10–15% waste from cracked tiles), and it shows every fingerprint and water spot. Glass mosaic sheets (typically 12×12-inch mesh-backed squares) simplify layout but cost $12–25 per square foot. Use white thinset mortar, gray shows through translucent tiles.
Natural stone, marble, travertine, slate, brings texture and organic variation that appeals to designers who favor natural materials. Marble is the classic choice, but it’s porous and acid-sensitive. Lemon juice, vinegar, and tomato-based foods will etch the surface. It requires sealing every 6–12 months and still might stain. Honed or tumbled finishes hide wear better than polished. Slate and soapstone are more forgiving but limited in color range. Stone tiles run $8–30 per square foot depending on grade and finish.
Choosing the Right Backsplash Style for Your Kitchen
Style decisions start with the existing kitchen. A backsplash should complement countertops and cabinetry without competing for attention, unless the goal is an intentional focal point.
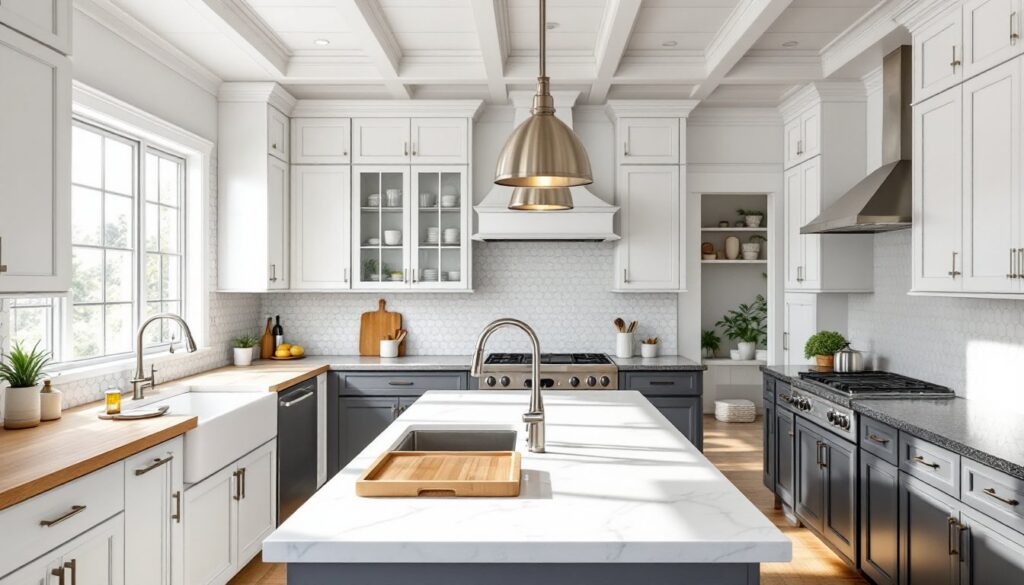
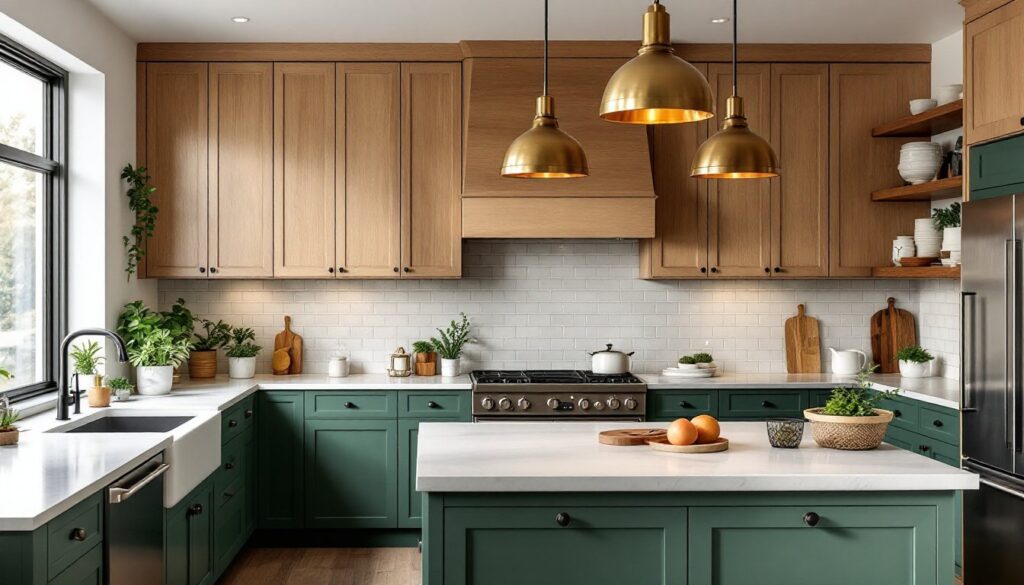
For neutral or white kitchens, a patterned or colorful backsplash adds personality without overwhelming the space. Cement tiles, Moroccan zellige, or bold geometric patterns work here. If countertops already feature heavy veining (like bookmatched marble or busy granite), a simple subway tile or solid-color backsplash keeps things balanced.
Dark cabinetry pairs well with lighter backsplashes that reflect light and prevent the kitchen from feeling cave-like. White or light gray tile, glass, or even mirror (yes, mirrored backsplashes exist and are surprisingly practical) brighten the space. Conversely, light cabinets can handle darker grout lines or charcoal tile without visual weight becoming an issue.
Consider the backsplash height too. Standard height runs from the countertop to the bottom of the upper cabinets, typically 18 inches. Full-height backsplashes (floor to ceiling or to the range hood) create drama and eliminate the awkward gap where wall paint meets tile. This approach works best with simple tile patterns: busy designs floor-to-ceiling can feel chaotic.
For open shelving or kitchens without upper cabinets, extending the backsplash 24–36 inches above the counter provides adequate protection and defines the kitchen zone. Some designers recommend thoughtful backsplash selections that tie together multiple kitchen elements without overwhelming smaller spaces.
Layout Patterns That Make a Statement
The same tile looks completely different depending on how it’s laid. Pattern choice affects the perceived size of the space, the difficulty of installation, and material waste.
Subway pattern (also called running bond or brick pattern) is the default for 3×6-inch tiles. Each row offsets by half a tile, mimicking brickwork. It’s beginner-friendly, hides minor layout errors, and works in any kitchen style. Vertical subway (tiles stacked vertically instead of horizontally) adds height and a modern twist.
Herringbone and chevron patterns add visual interest but require more cuts and careful planning. Herringbone uses rectangular tiles arranged in a V-shape, with each tile meeting the next at a 90-degree angle. Chevron tiles are cut at an angle so the ends meet in a point. Both patterns use 30–40% more material due to edge cuts. A wet saw with an angle guide is essential, this isn’t a score-and-snap job.
Stacked or grid pattern (tiles aligned in straight rows and columns) looks clean and modern but highlights any imperfections in the wall or tile size. Grout lines form a perfect grid, so if tiles are even slightly off, it’s obvious. Rectified tiles (machine-cut for precise dimensions) work best here.
Mosaic sheets simplify installation of small tiles (penny rounds, hexagons, or small squares). The tiles come pre-mounted on 12×12-inch mesh backing, so the pattern is already set. These work well as accent bands or in small areas but can be tricky to keep level across large expanses. Lippage (uneven tile edges) becomes more noticeable with mosaics.
Remember: complex patterns increase labor time. A professional kitchen designer typically charges 30–50% more for herringbone installation than for straight subway.
Budgeting and Installation: DIY vs. Professional
A typical 30 square-foot backsplash (the area behind a standard countertop run and range) costs $240–900 in materials, depending on tile choice. Add grout, thinset mortar, spacers, and sealer, and materials hit $300–1,000 for most projects. Professional installation adds $400–1,200 depending on region and pattern complexity.
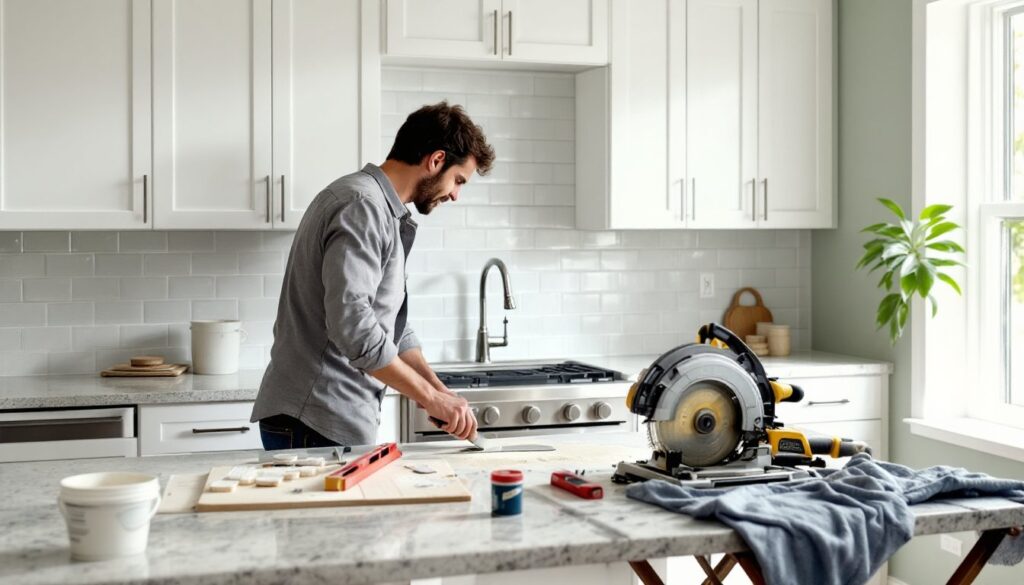
DIY installation is realistic for homeowners comfortable with measuring, cutting, and working methodically. Required tools include:
- Wet saw with diamond blade ($100–150 to buy, $40–60/day to rent)
- Notched trowel (¼-inch notches for most wall tile)
- Tile spacers (1/16-inch or ⅛-inch, depending on grout line preference)
- Grout float and sponges
- Level (4-foot minimum)
- Safety gear: goggles, dust mask, and gloves
Surface prep determines success. The wall must be flat, clean, and solid. Drywall is acceptable for most backsplashes, but areas behind sinks and ranges should have water-resistant drywall (green board or purple board) or cement backer board. Existing paint needs scuffing with 80-grit sandpaper to improve thinset adhesion. Remove outlet covers and turn off power at the breaker before tiling around electrical boxes.
Layout is critical. Dry-fit tiles on the counter before mixing thinset. Start from the center of the wall and work outward, or from a focal point (like the range). Avoid narrow slivers of tile at edges, adjust the layout so end cuts are at least half a tile wide. Use a laser level or chalk line to establish a straight starting line: kitchen counters aren’t always level.
Thinset mortar should be mixed to peanut butter consistency and applied with the flat side of the trowel, then combed with the notched edge. Press tiles with a slight twist to embed them. Work in 3–4 square-foot sections so thinset doesn’t skin over.
Grout goes in 24 hours after tiling. Mix unsanded grout for joints narrower than ⅛-inch, sanded for wider joints. Apply diagonally across tiles with a grout float, then wipe excess with a damp sponge. Haze will form as grout dries, buff it off with a dry towel.
When to call a pro: if the backsplash involves cutting around windows, complex angles, or running tile up to a custom range hood. Also if the wall isn’t plumb (more than ¼-inch out of level over 4 feet) or if electrical or plumbing lines need relocating. Licensed tile setters charge $5–12 per square foot for labor, and they carry insurance if something goes wrong.
Permits aren’t required for backsplash installation in most areas, but if the project involves moving outlets, a licensed electrician and electrical permit are non-negotiable per NEC guidelines. Budget $150–300 for an electrician to relocate a single outlet or add a new one if the backsplash design requires it.